Overview
Flex integrates with RevenueCat to help you manage subscriptions seamlessly across platforms. This guide walks you through connecting your RevenueCat account to Flex, passing a stable customer identifier, saving the integration, and understanding how events map between systems.Installation Guide
1
Add RevenueCat in Flex
Log in to your Flex Dashboard.Go to Integrations → RevenueCat.Enter your RevenueCat App ID and API Key.
-
You can find these in your RevenueCat project under App Settings.

2
Configure in RevenueCat
In your RevenueCat project, open the Apps section.Click + Add and select Other payment provider.Copy your App ID and Secret API Key.Paste these values into the Flex Dashboard RevenueCat fields from Step 1.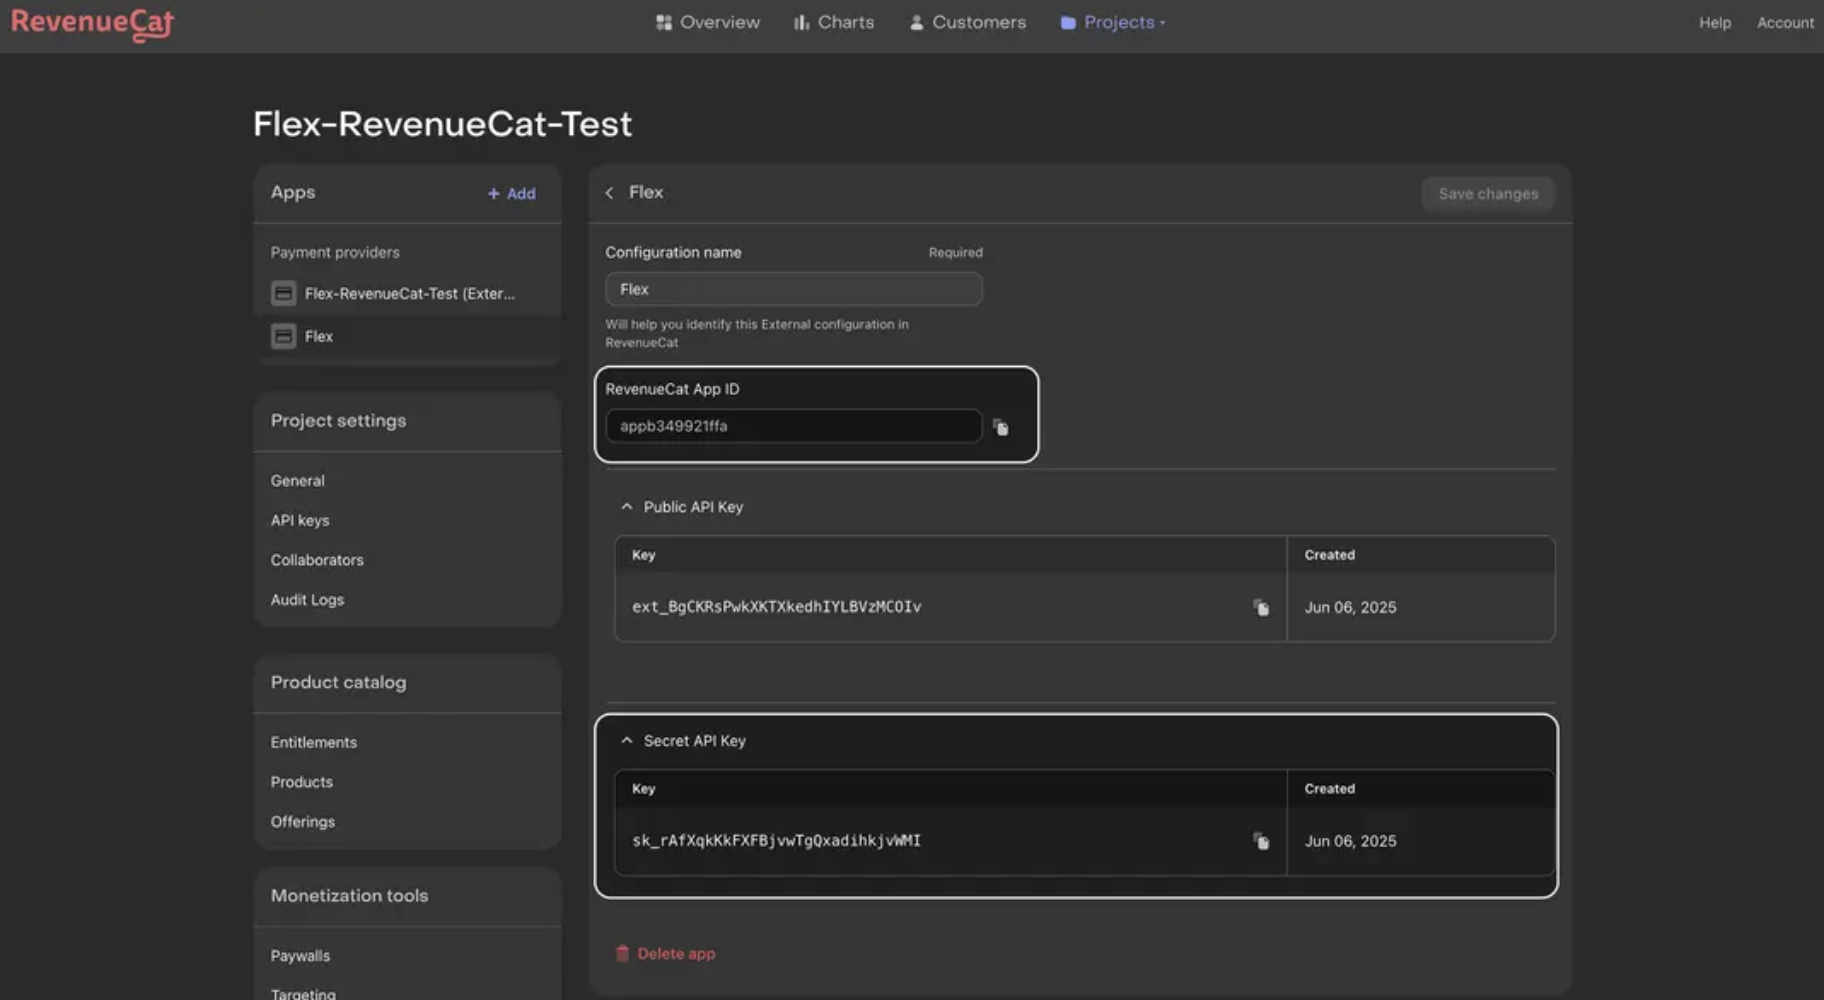

If you don’t see “Other payment provider (External source)” in your RevenueCat Apps page, that option may not be enabled for your project.Please contact RevenueCat Support and ask them to enable the External payment provider integration for your project.Include:
- Your Project ID / link
- The App name
- That you want to connect Flex as the external payment provider
3
Pass a Custom User Identifier to RevenueCat
If you want RevenueCat to reference your own user ID (or a Flex user ID), include it in the checkout session
metadata as REVENUE_CAT_CUSTOMER_ID.4
Save and Sync
Click Save in the Flex Dashboard integration page.Flex will begin sending subscription events to RevenueCat so customer status stays in sync.
Tip: If you have existing subscriptions, run an initial sync (or perform a backfill) so historical subscriptions are recognized in RevenueCat.
How It Works
After connecting, Flex forwards subscription lifecycle events to RevenueCat so your app logic, entitlements, and paywalls stay accurate. Events include:- Trial activations and conversions
- Renewals and successful payments
- Payment failures and recoveries
- Cancellations and expirations
- Trial Purchase
Stripe:customer.subscription.created(status: trialing) → RC: trialing (no payment) - Trial Conversion
Stripe:subscription.updated→ active +invoice.payment_succeeded→ RC: active + payment - Renewal
Stripe:invoice.payment_succeeded(subscription_cycle) → RC: active + payment - Billing Issue
Stripe:invoice.payment_failed(status: past_due) → RC: in_grace_period, no payment, usesnext_payment_attempt - Recovery
Stripe:invoice.payment_succeededafter failure → RC: active + payment - Cancel at Period End
Stripe:subscription.updated(cancel_at_period_end) → RC: active, auto_renewal_status: will_not_renew - Manual Cancellation
Stripe:customer.subscription.deleted(no expiry state) → RC: same as “Cancel at Period End” - Expiration
Stripe: final state such asincomplete/expired/unpaidwithcustomer.subscription.deleted→ RC: expired, gives_access: false
Troubleshooting
My API key or App ID isn’t working
My API key or App ID isn’t working
- Make sure you copied them directly from RevenueCat’s App Settings without extra spaces.
Subscriptions aren’t updating in RevenueCat
Subscriptions aren’t updating in RevenueCat
- Confirm the Flex integration is saved.
- Check if events appear in RevenueCat’s recent activity log.
I don’t see “Other payment provider” in RevenueCat
I don’t see “Other payment provider” in RevenueCat
- Make sure you’re in the correct App in RevenueCat.
- Contact RevenueCat support to confirm your plan supports custom payment providers.